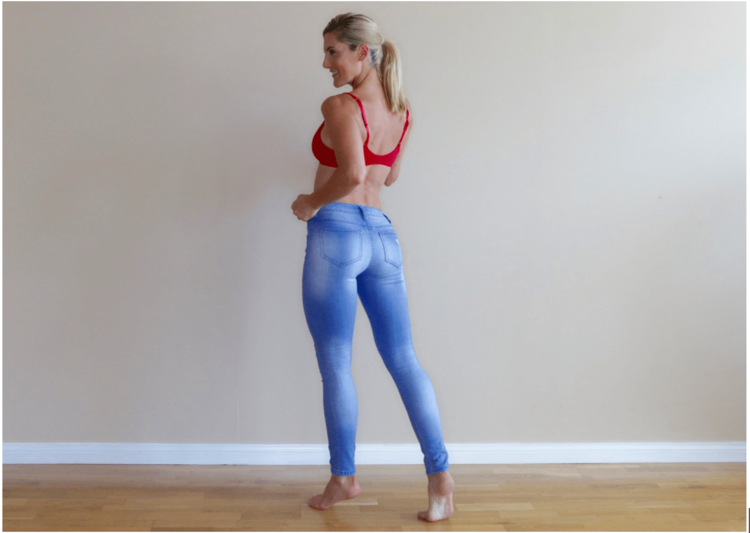
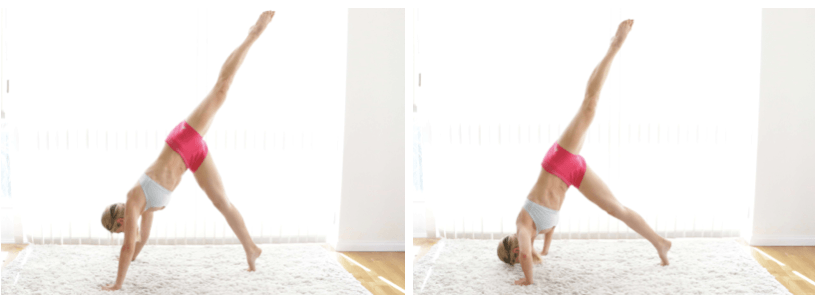
Stretch bands are an amazing tool to train the booty with resistance.
All of these moves can be done without the band as well, but why not add this simple and affordable piece of equipment to make the workout more challenging and more effective!
This workout is travel-friendly as well since the entire workout is do-able from a hotel room or your living room and the band is so small and easy to pack and take on the go.
Now you can stay beach-booty ready at all times with this workout as your secret weapon.

To complete this workout all you will need is one elastic loop resistance band. No shoes are required, but wear them if you like. You may also want an exercise mat if you’re working out on a hard surface.
We’ll do 8 different exercises as two different circuits. The first 4 exercises are standing, the following 4 are seated.
Here’s how to do the workout:
- Complete the 4 standing exercises as a circuit for 3 rounds, before moving on to the next 4 exercises.
- Complete the 5 seated exercises as a circuit for 3 rounds.
Two options for Reps:
- Option 1: Follow the number of reps given for each exercise, rest about 15 seconds between exercises
- Option 2: use a timer and set it for intervals of 45 seconds work on each exercise, 15 seconds rest between exercises
Either way, take about 30 seconds between rounds and 1-2 minutes between circuits. Here are the 4 standing exercises for the first circuit:
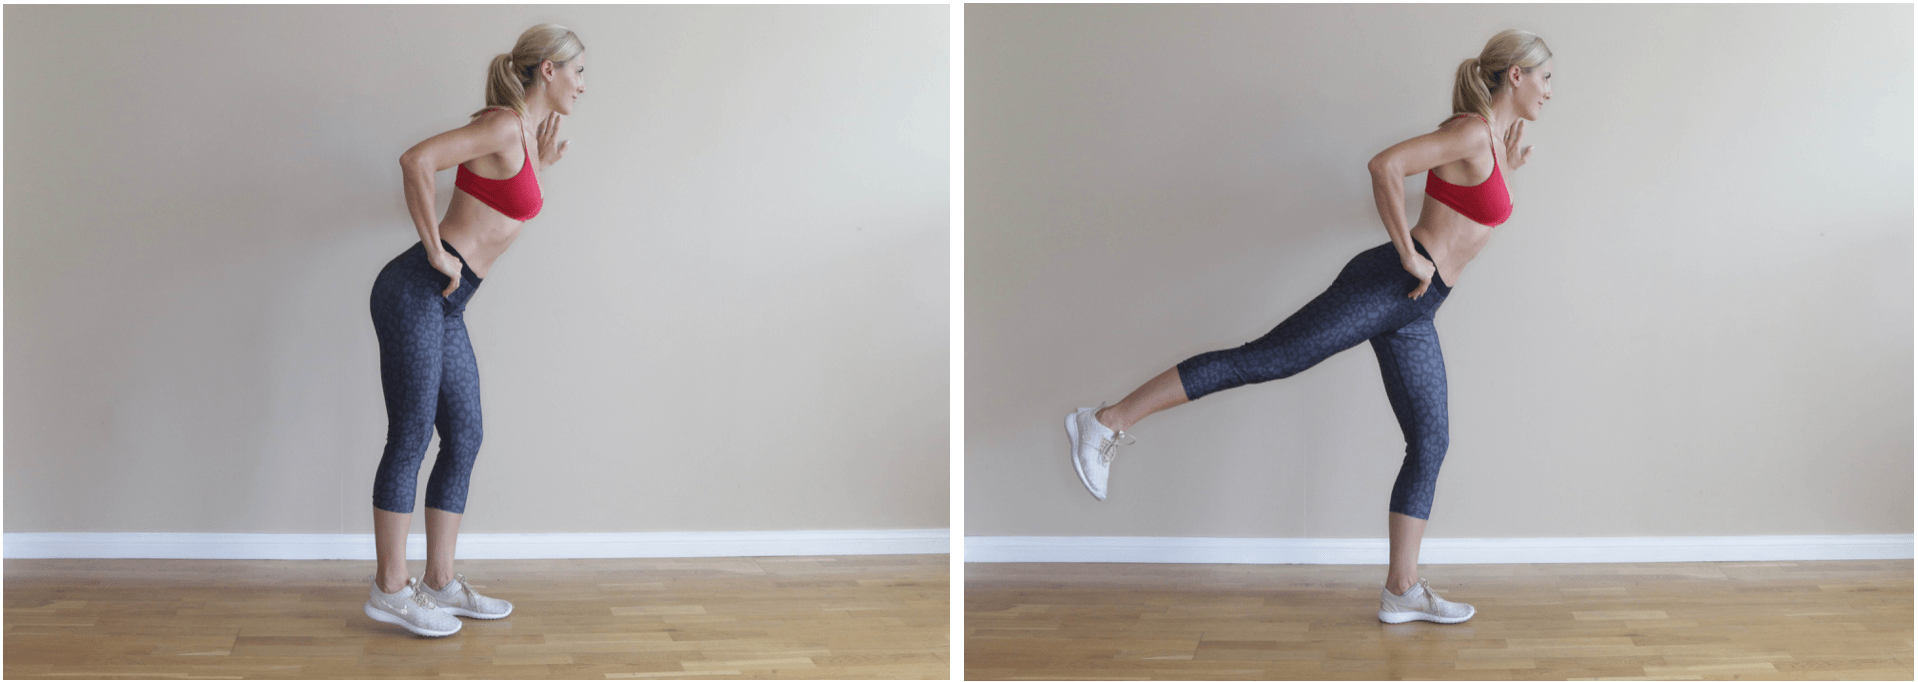
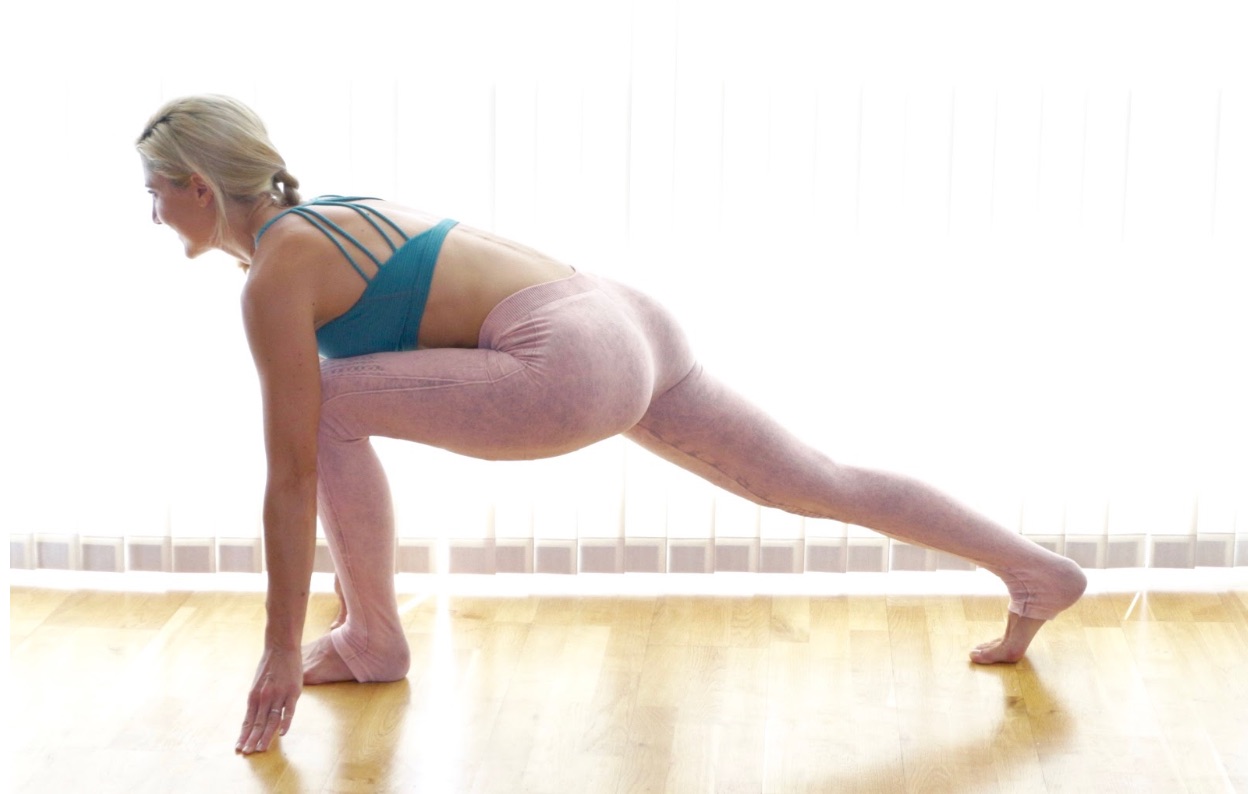
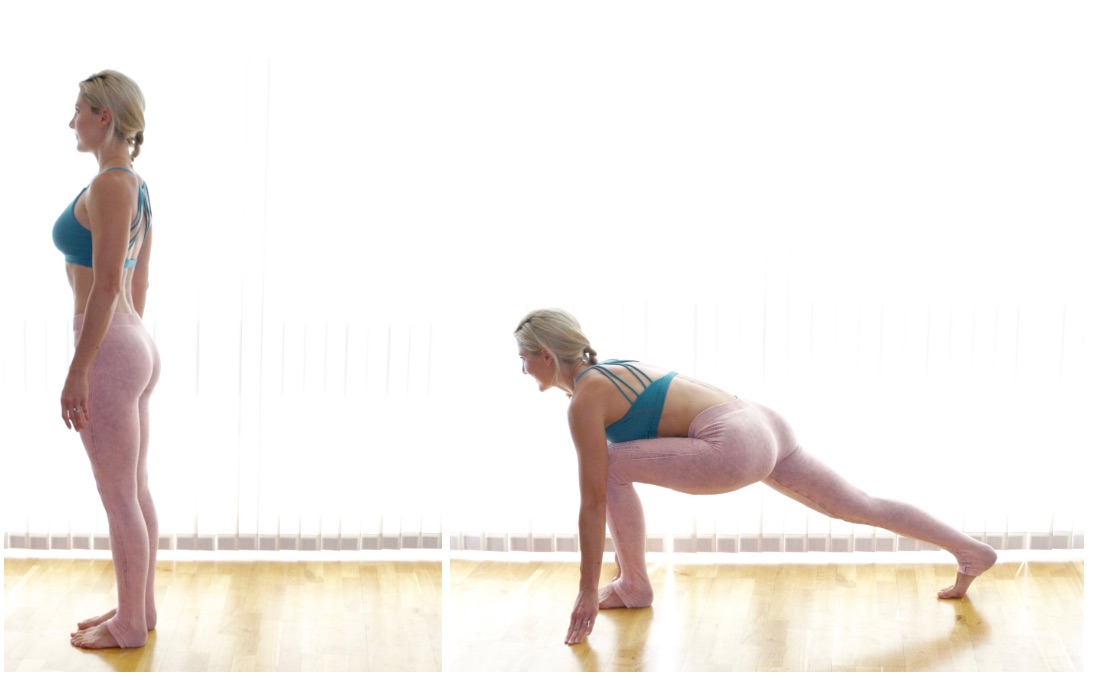
Resisted Stiff Leg Deadlifts
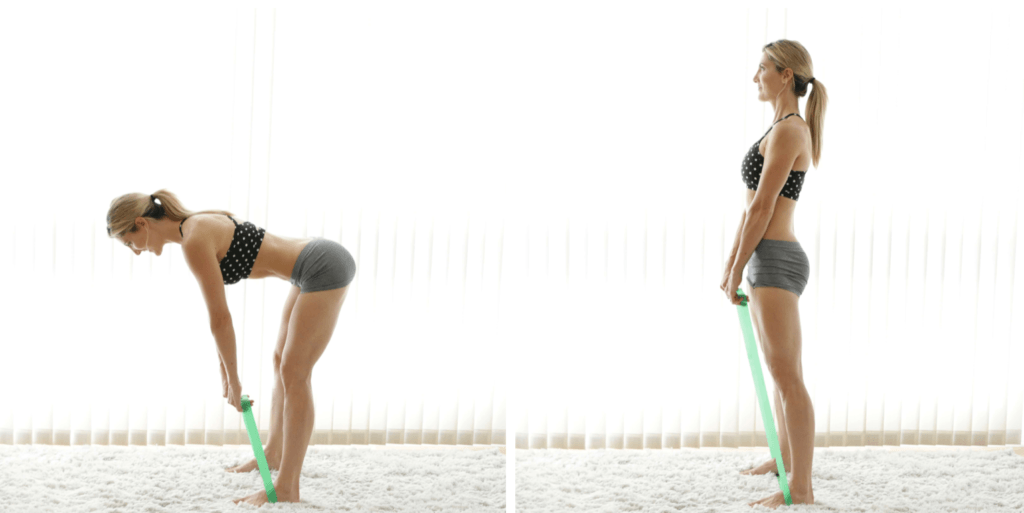
Deadlifts are excellent for strengthening your lower back, hamstrings, and glutes. They will noticeably lift, firm and elevate your butt.
Begin by stepping your feet onto one side of the resistance band and grabbing the other side with both hands. Make sure your back is straight (not rounded) and your shoulders are in line with your hips. Look straight down at the ground so that you don’t overextend your neck.
Keep a slight bend in your knees. Your feet should be placed about hip-width apart. Keep a tight hold on the band with your hands and by initiating movement from your hips, stand all the way upright, flexing your butt and legs.
Do not bend your elbows or shrug your shoulders. Keep your upper body relaxed and unstressed.
Keeping a tight core, slowly hinge at your hip joint to return down to the starting position. Do not go so low that you lose tension on the stretch band. Stop lowering once you feel a stretch sensation in your hamstrings and you’re as low as you can get without rounding your lower back.
Exhale each time you stand and flex your butt and inhale each time you lower back to the starting position.
Instructions: Do 15 reps – or perform as many as you can in 45 seconds.
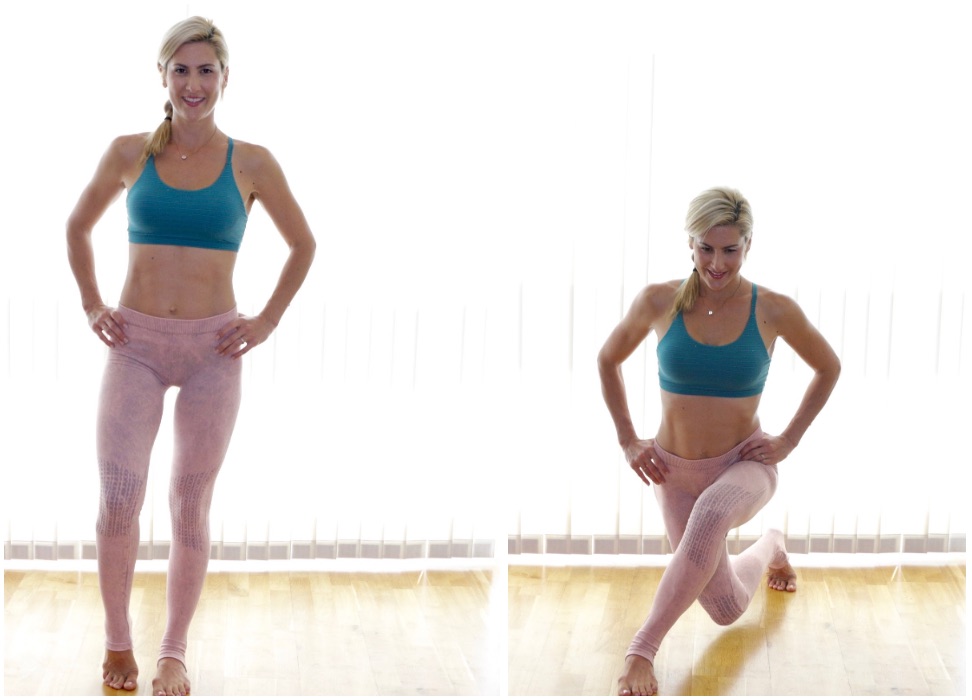
Squat Side Kicks
Squats are amazing for toning your butt, but add this sidekick and you’ll feel the benefit in your inner and outer thighs as well!
Start with the resistance band around your knees, just below the kneecaps and assume a squat position. Make sure your weight is heavy on your heels, not on the toes, this alignment is important to make sure you work your butt instead of your thigh muscles.
Next, as you stand up, lean all your weight to one side, allowing your other foot to lift off the ground and kick up to parallel with the ground.
Aim to use your strength instead of swinging the leg up, and pause for just a moment at the top, before slowly lowering your leg back down with control.
When you are in the squat position, ensure that your knees are pointing straight ahead over your toes and not caving in towards each other. Alternate sides, going all the way down into your squat between each one.
Instructions: Do 20 reps alternating OR as many as you can in 45 seconds.
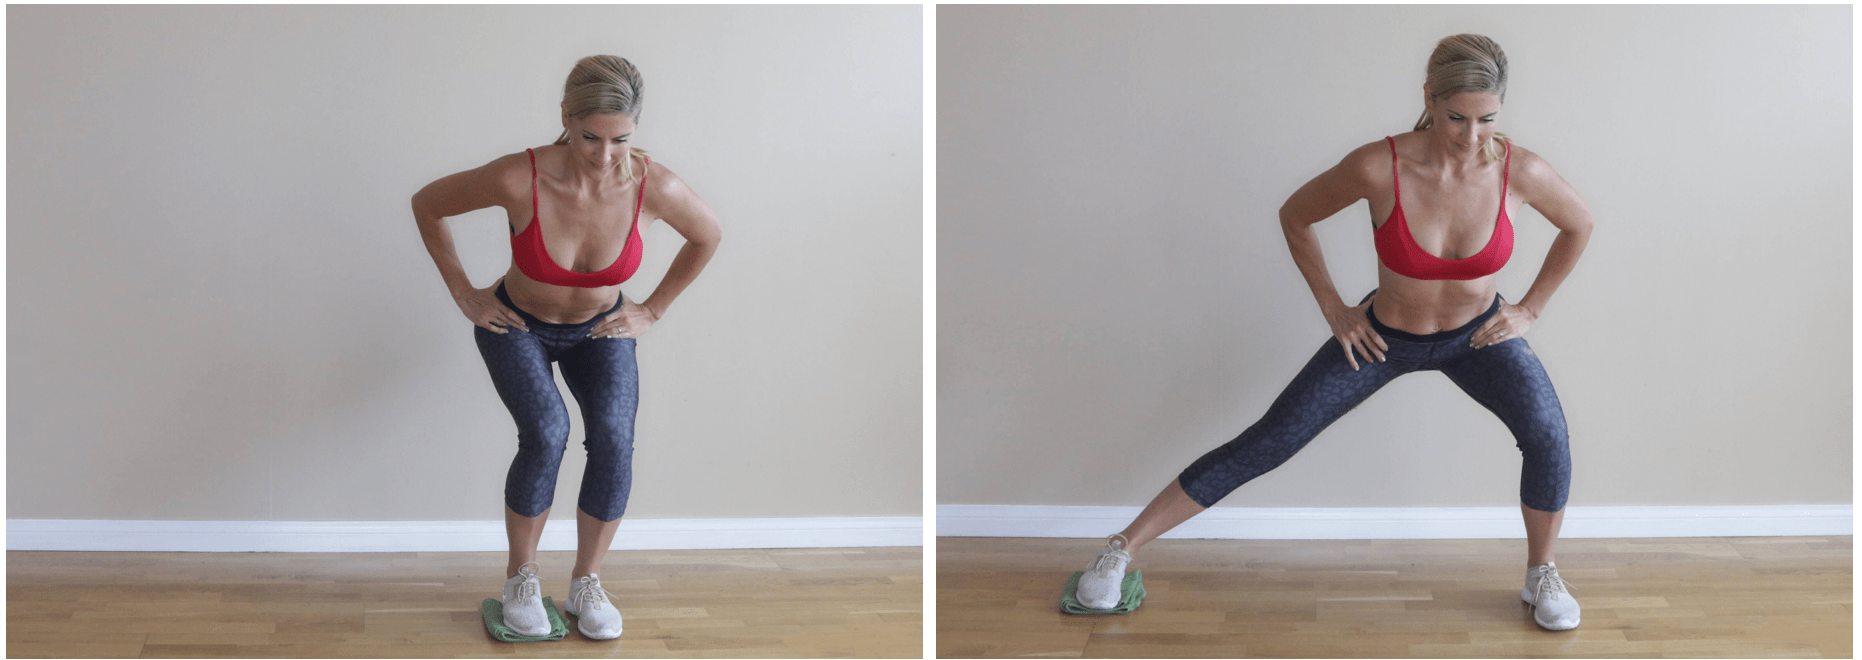
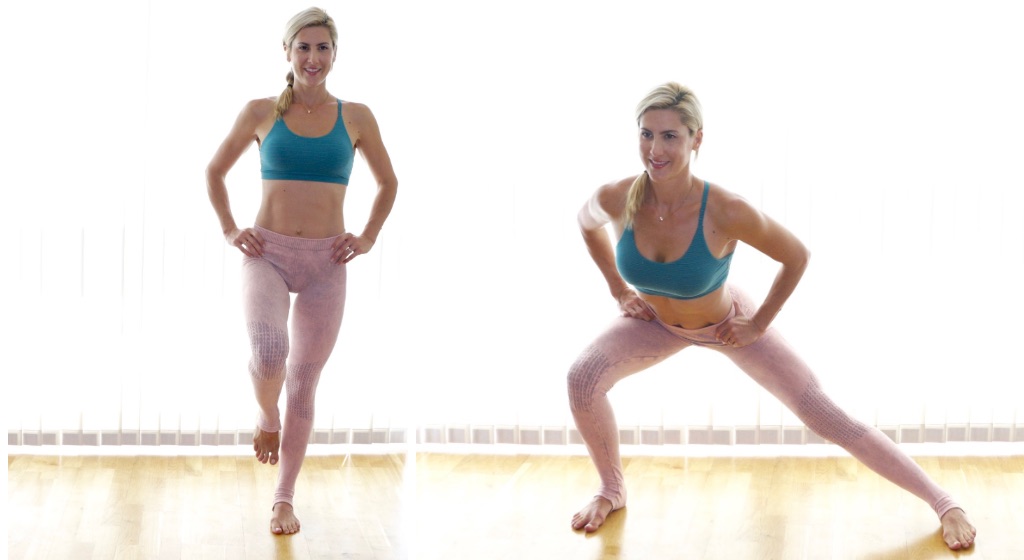
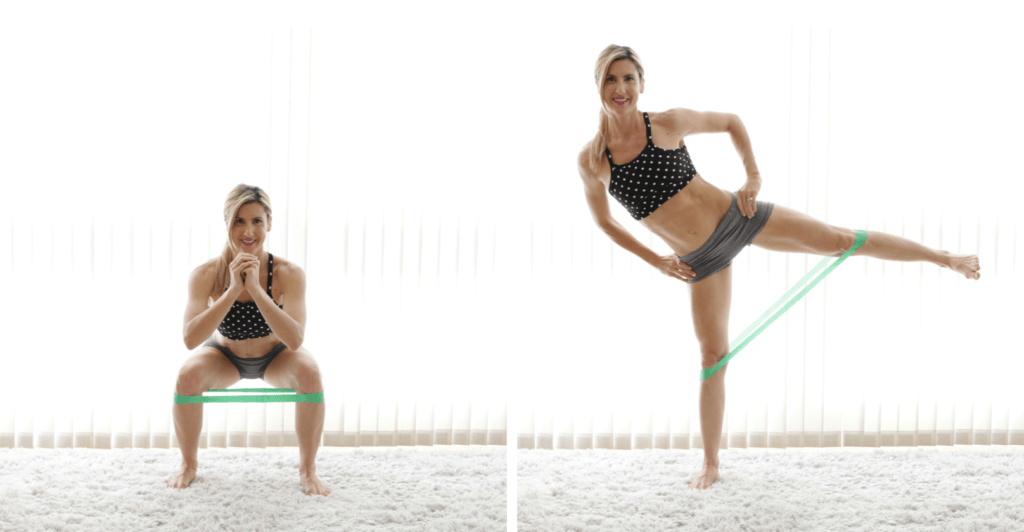
Squat Hold Butterfly’s

Butterfly’s are a great hip abduction exercise. The muscles that are responsible for abduction are the gluteus maximus, medius, and minimus – basically all your butt muscles! Which makes this exercise amazing for booty isolation training.
Keeping the band in the same position as before: just below the kneecaps. Assume the same squat position with your weight shifted back so that the pressure is on your heels. Hold your hands just in front of your chest with your elbows lightly touching your knees.
Now stretch the band as wide as you can, opening your knees out to the sides, away from your elbows.
Flex all of the muscles in your butt, then return your knees back towards your elbows with control. Do not lose tension on the band, it should feel tight throughout the exercise.
Don’t worry if the range of motion feels small – your knees should only move about 4-6 inches farther apart and back. It is a small movement, but a powerful one.
Instructions: Do 25 reps OR as many as you can do in 45 seconds.
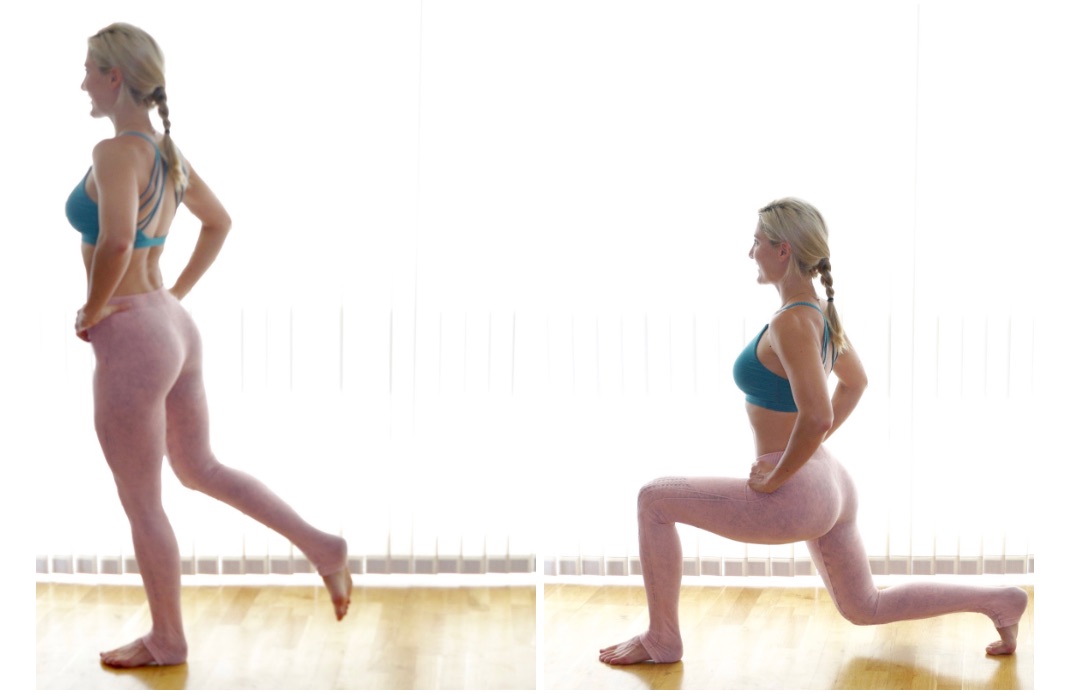
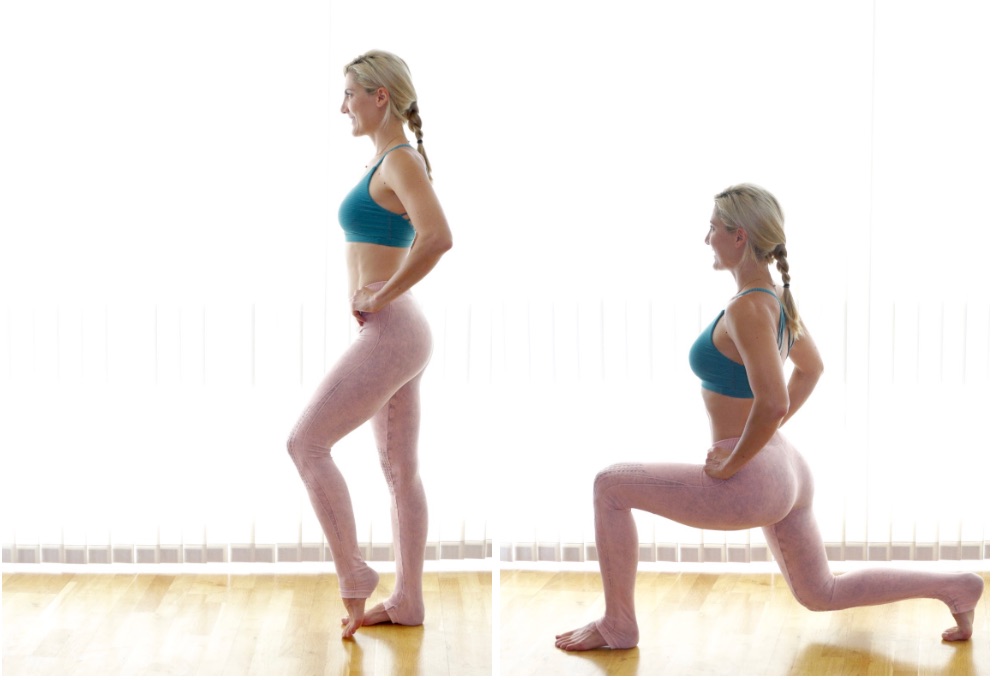
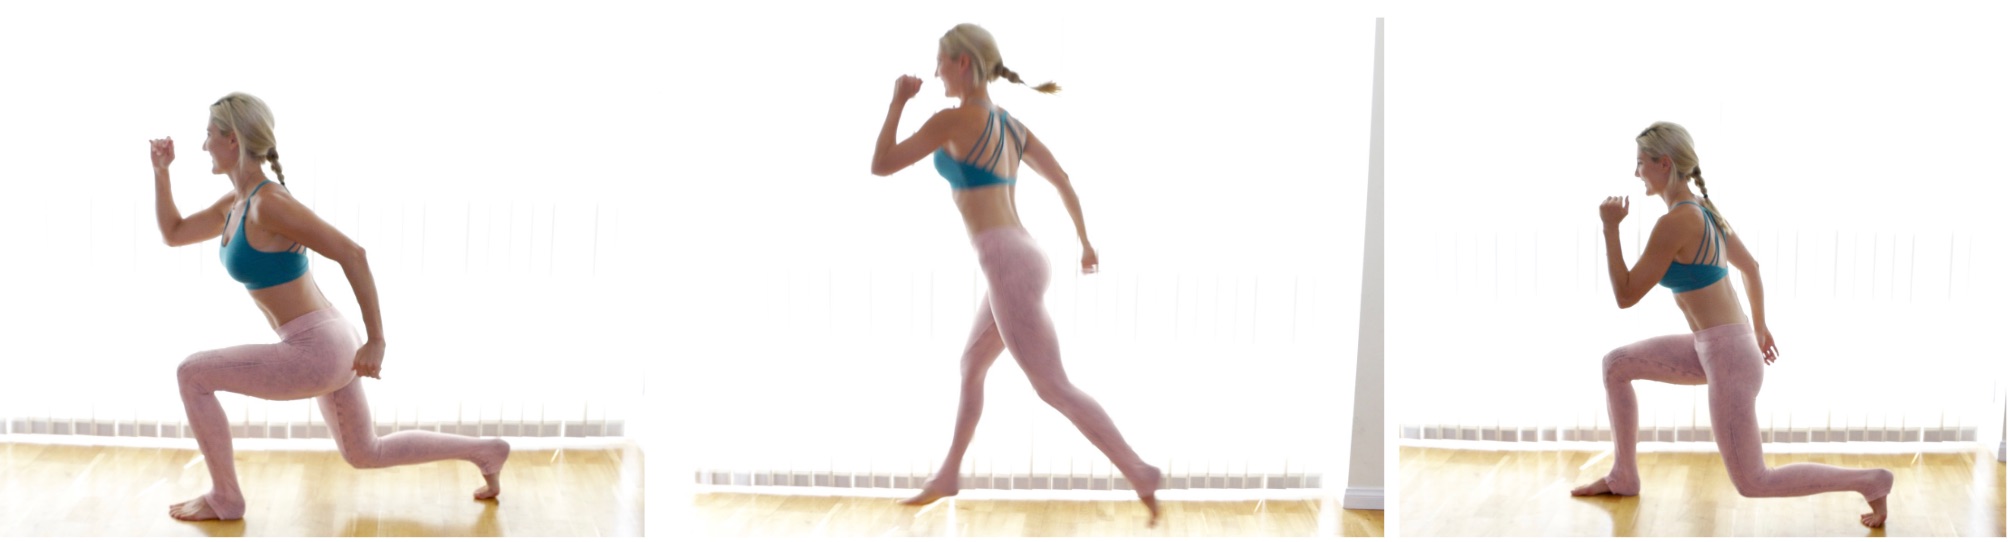
Split Squat Kickbacks

I call this one a “split squat” instead of a lunge because the movement is only up and down, rather than forward and back. We’ll add a kickback to increase the booty training even more!
Start with the resistance band just below your knee caps. Step one foot back behind you into a lunge position, with both knees, bent at a 90-degree angle. Make sure your back is straight and your core is tight. Keep your hands on your hips for balance and stability.
Place the majority of your weight onto your front foot. As you lift up out of the split squat, lean forward and kick the back leg back behind you.
Do not straighten your standing leg all the way or the stretch band may roll up on you. Keep a slight bend in the knee to ensure your resistance band stays put. Lower back down into the split squat position and repeat.
Instructions: Do 10 reps per side OR 20 seconds on the right and 20 seconds on the left, with 5 seconds to switch sides.
After you finish all 3 rounds of the 4 exercises standing circuit, move on to the seated exercise circuit below:
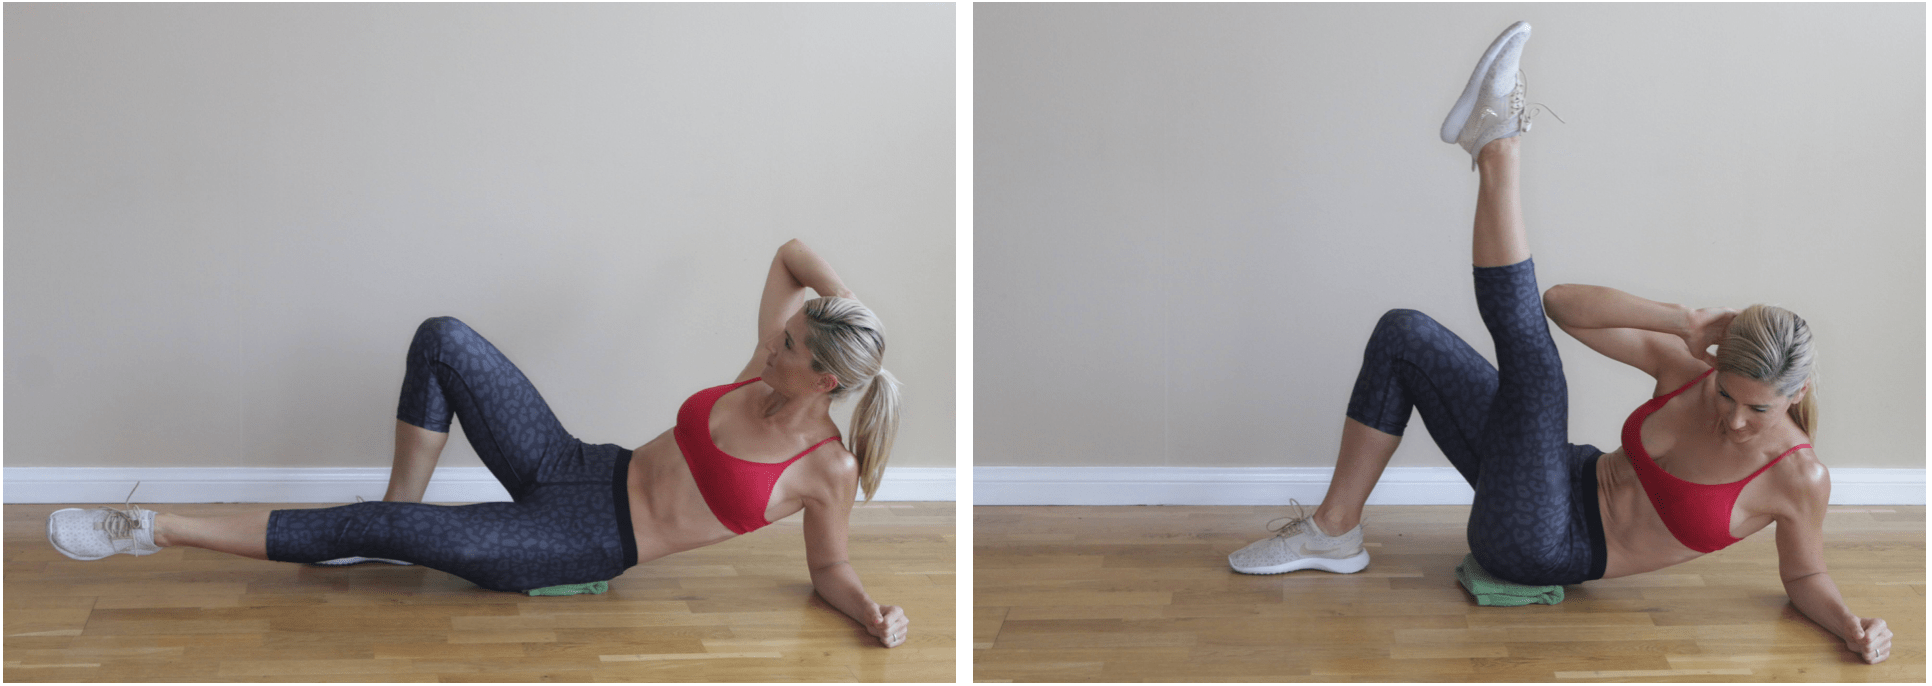
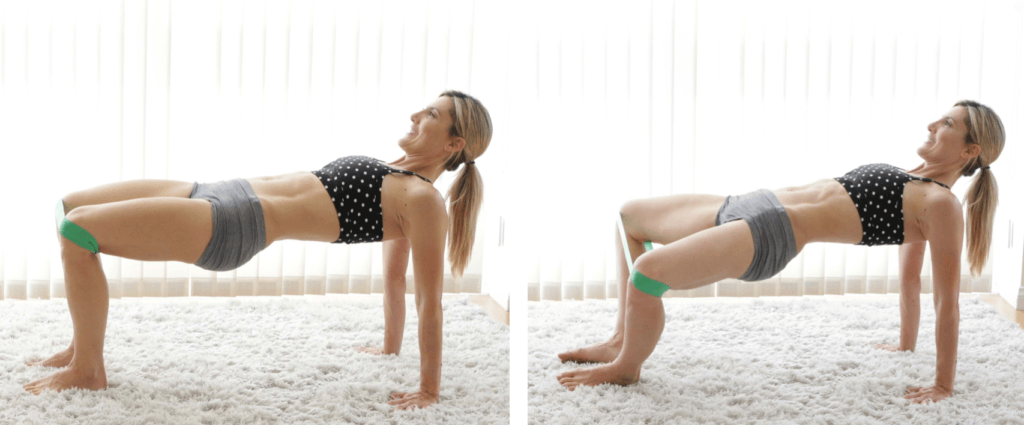
Resisted Glute Bridge
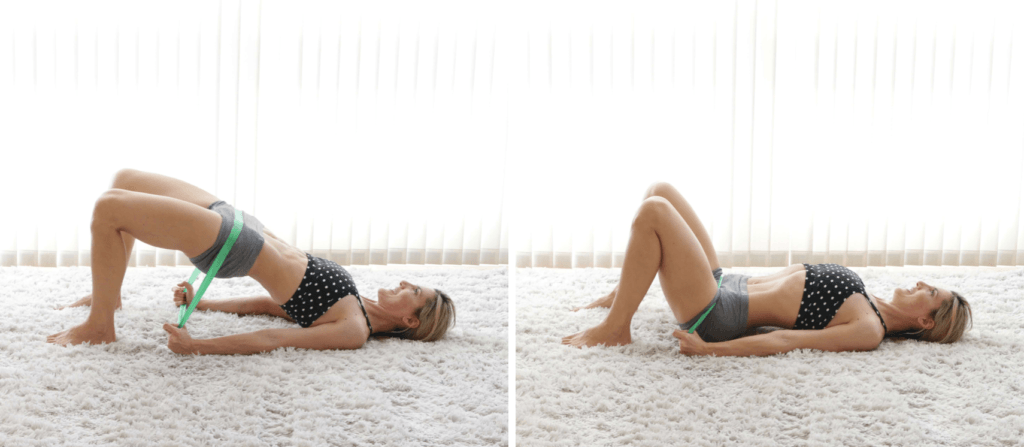
Glute Bridges are a classic butt toner. Without any resistance though, these can be too easy & a bit boring. Add a stretch band to take them to a whole new level of burn!
Start by stepping into the stretch band with both feet and working it all the way up to your hips, like a belt.
Lay down on the floor, on your back and place your feet about 6 inches from your butt. Hold onto the stretch band on either side of your hips and firmly hold it in place pressing your fists down towards the ground.
Lift your hips up to the top of the bridge position. Keep your core tight and be careful not to overextend your back.
Ideally, your body will form a straight line from knees to chest. Slowly lower your hips back towards the ground to touch the ground but not rest on it. Continue reps focusing on flexing your butt at the top each time.
Instructions: Do 20 reps OR as many as you can in 45 seconds.
All Fours Kickbacks
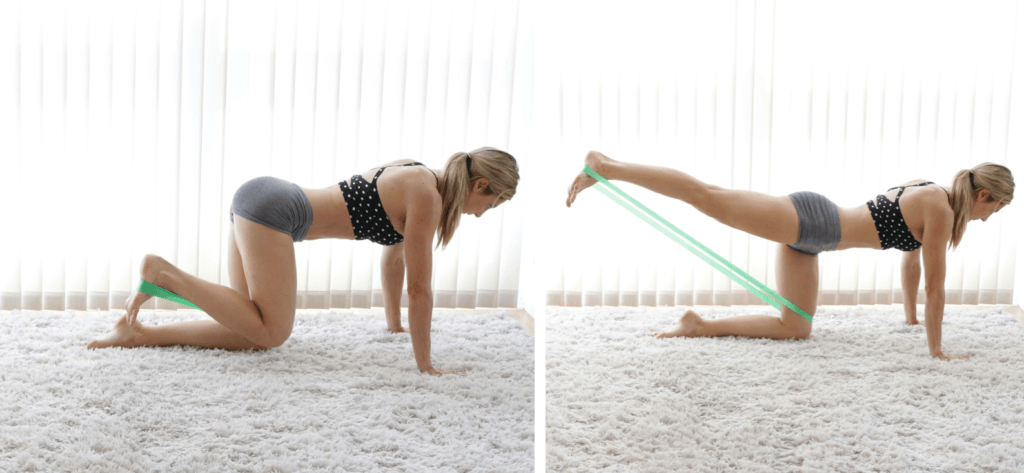
Kickbacks are one of my favorite butt exercises. Do these often if you want to see a well-rounded bum.
Start by looping the stretch band around one thigh.
Get down to the ground in an all fours position and place your foot of the free leg into the stretch band. Make sure the band is straight and not twisted.
Once your foot is in, line up your knees and check that your hands are directly under your shoulders and your spine is straight with a slight natural curve in your lower back.
Kick the stretch band back until your leg is fully straight and the band is stretched to maximum capacity. Lift your straight leg just a few inches above the hip level to ensure that you flex your butt muscles.
Slowly lower that leg back down to the starting position and repeat.
Instructions: Do 15 reps on each side OR 20 seconds on the right and 20 seconds on the left, with 5 seconds to switch sides.
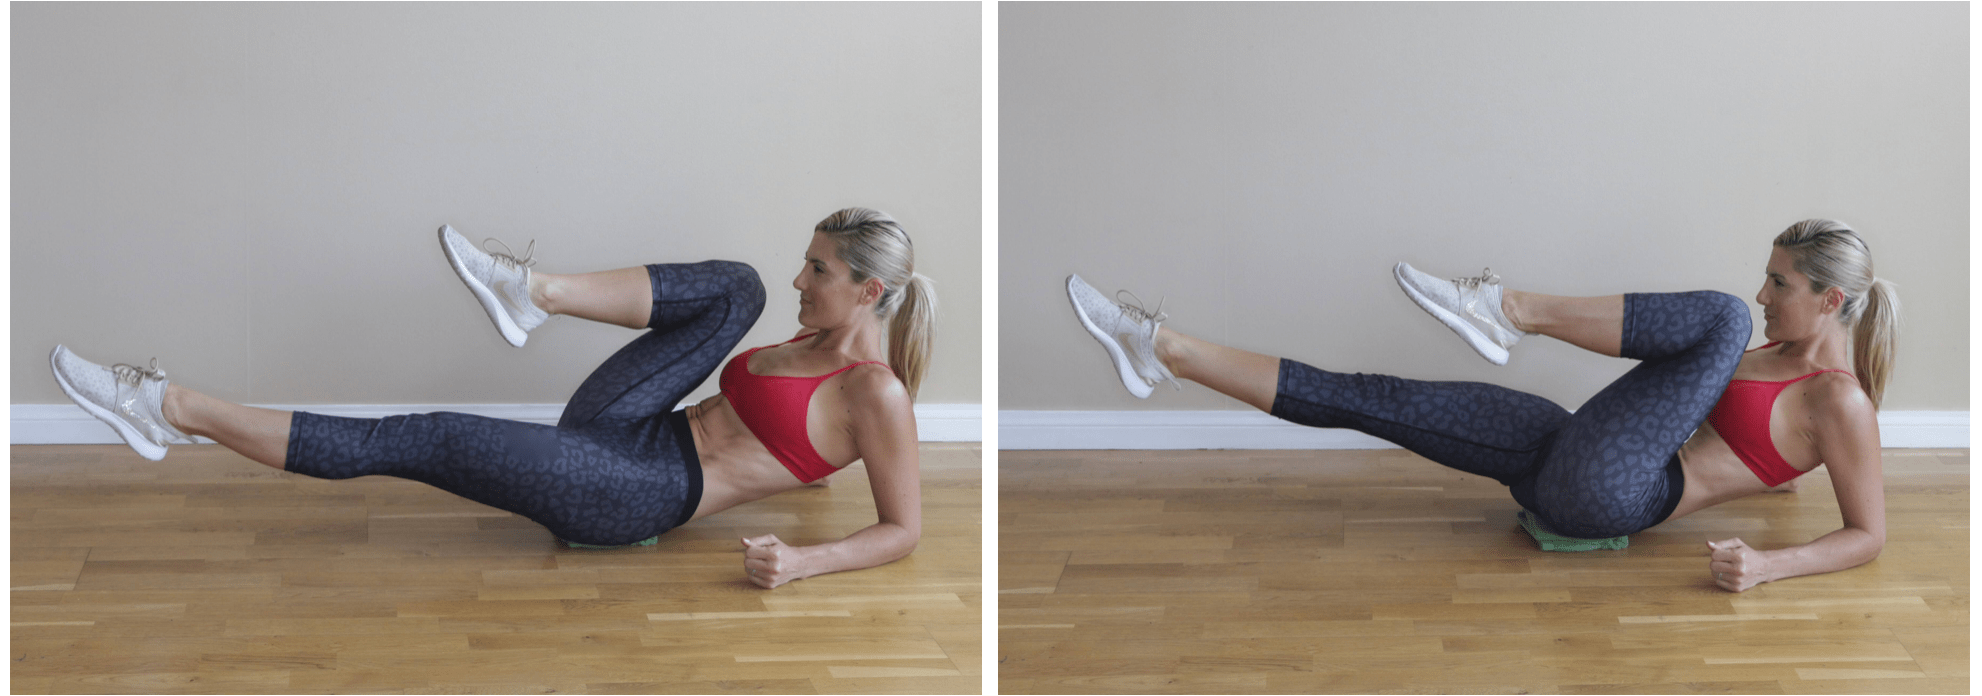
Crab Butterfly’s
The crab is one of the best core training positions since it’s essentially an upside-down plank. But add this butterfly move and you’ll be feeling the ultimate booty burn.
Place the resistance band around your knees, just on top of or below the kneecaps. Get into a crab position, meaning place your hands just under your shoulders, your feet just under your knees and lift your hips up so that your body forms a table-like position.
Keep your neck strong and look either straight up at the ceiling or forward towards your knees. Your feet should be about hip width apart to ensure you have some tension on the band at all times.
Open your knees apart and stretch the band as much as possible, flexing your butt and legs. Slowly return to the starting position, but without allowing your knees to touch. Keep that tension.
Keep watching your crab position to make sure your hips stay elevated as much as possible throughout the movement. Breath and exhale each time you stretch the band apart.
Instructions: Do 20 reps OR as many as you can in 45 seconds.
Side Lying Kickbacks
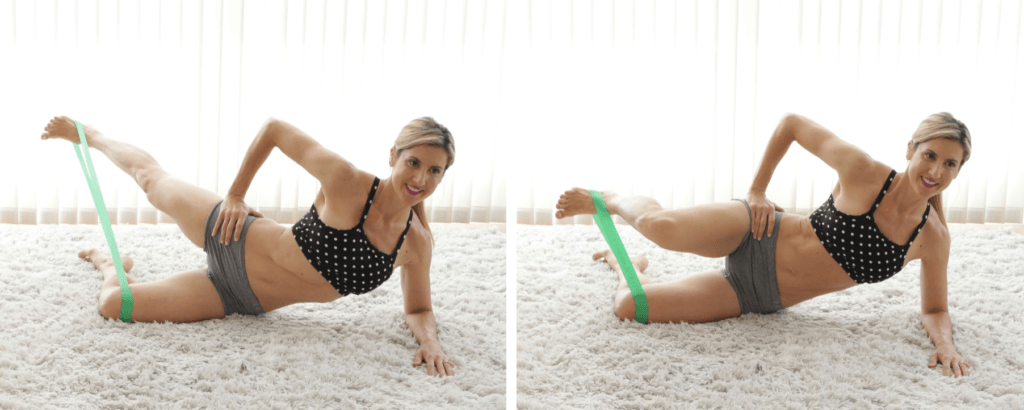
This is another great way to do kickbacks from a different position, which helps you hit a different angle of your booty. Plus towards the end of the workout, you’ll love getting the chance to lay down & keep working!
Place the band around one thigh, just above your knee. Lay down on your side, supporting your upper body with one arm and placing your other hand on your hip.
Bend your bottom leg to a 90-degree angle to create a base of support.
Place your foot through the band and lift it up until you feel tension on the band. Kick back and behind you flexing your butt but keeping your core as tight and stable as possible. Slowly return to the starting position, keeping that separation between your knees and never allowing the band to lose tension.
Repeat and exhale with each kick back.
Instructions: Do 12 reps on each side OR 20 seconds on the right and 20 seconds on the left, with 5 seconds to switch sides.
Complete these 4 seated exercises as a circuit and repeat 3 times.
Congratulations on working your booty with resistance bands. I hope you will save this workout and come back to it anytime you need a lift…